Authored by: Tractor tyre expert | 16 September 2022
The harvesting job is finished but you would like to have better yields going forwards, so it’s important to look ahead and prepare to ensure the best possible conditions for future campaigns. Many factors are involved when it comes to improving your yields; those over which you have little control, such as weather conditions or seed genetics, and those that you can control, such as improving the quality of your soil.
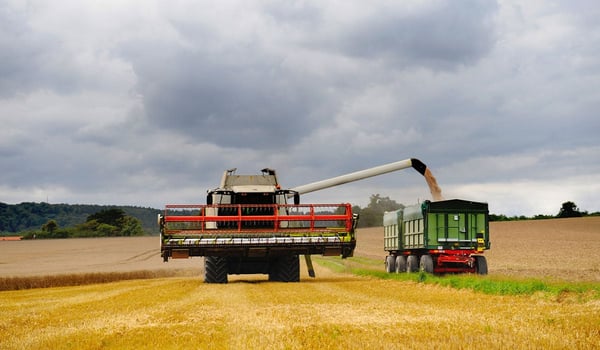
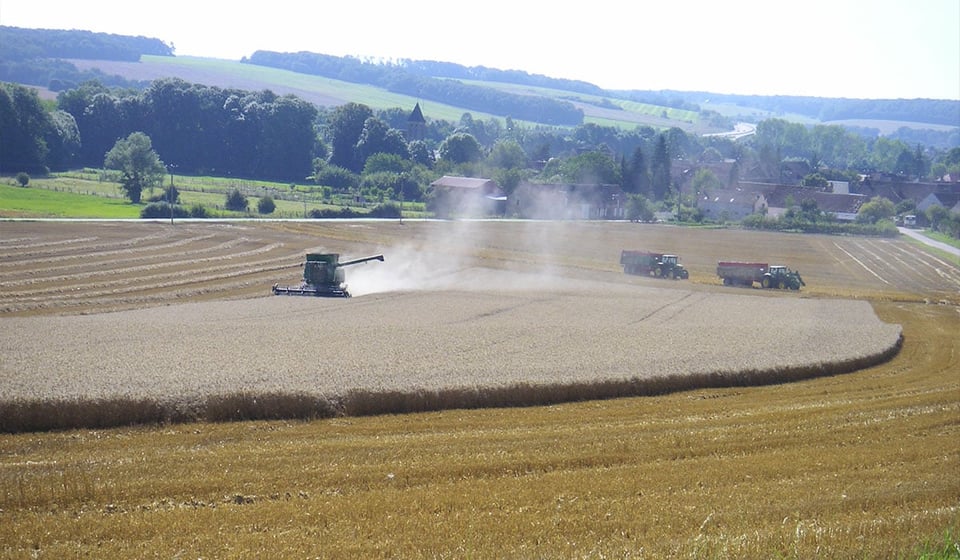
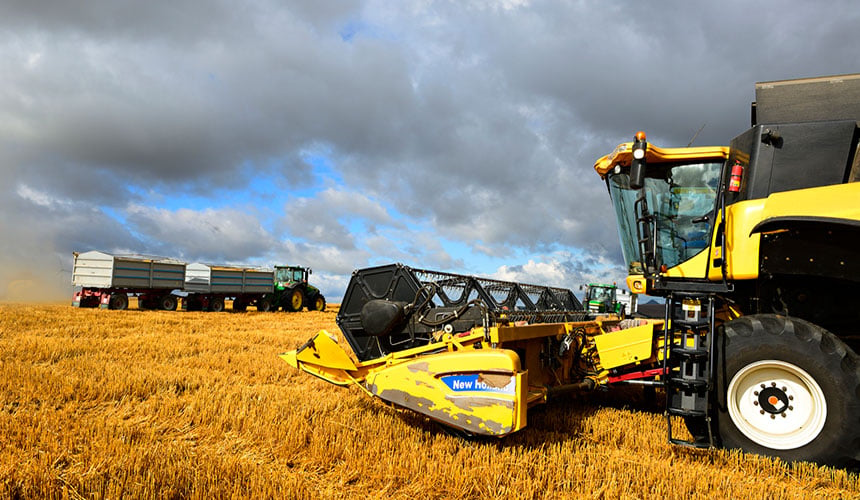
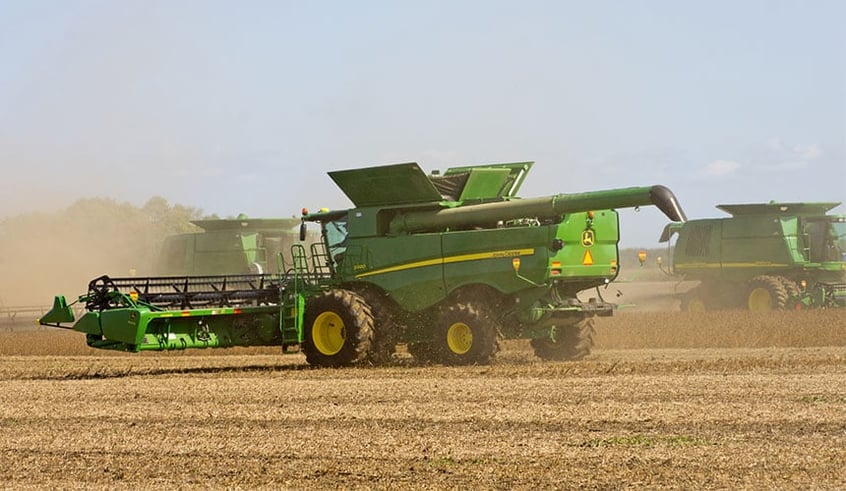
As the overall surface area of most farms has got bigger and bigger, the size of harvesting machines has also increased. While there are many benefits to using this type of equipment, there is also an impact on the quality of your soil.
A loaded combine harvester with its cutting bar may represent more than 28 tonnes on the front axle alone, and it is generally followed by trailers whose tyres may be inflated to 4 bar or even 4.5 bar to bear the load. The systematic criss-crossing over the land by the harvester and its full trailers will generate a maximum amount of compaction.
There are three main types of more or less deep compaction, including surface compaction and deep soil compaction which are directly linked to the harvesting campaign.
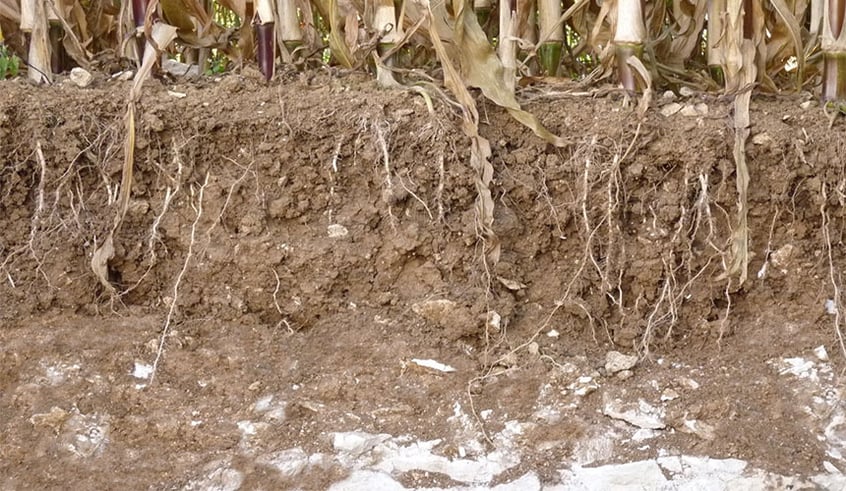
Surface compaction may go down about 30 cm deep and is limited to the arable layer of soil. Its main causes include the excessive traffic of loaded trailers, the use of overinflated tyres and repeated driving over the same spot.
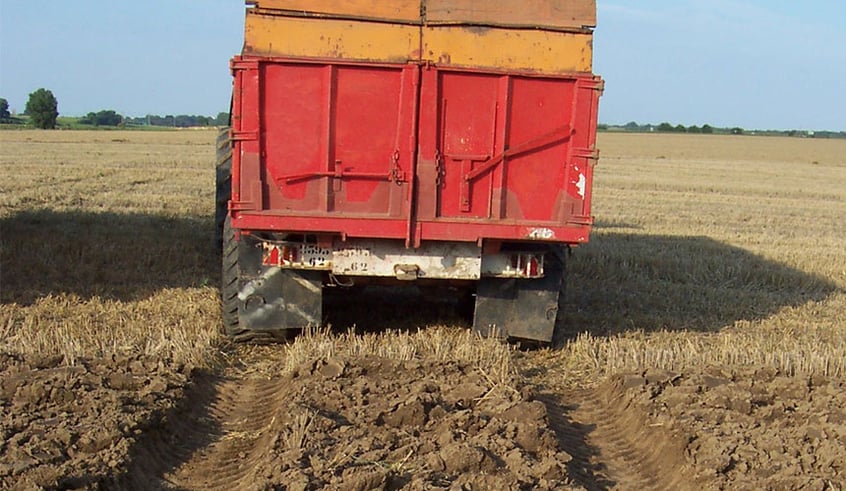
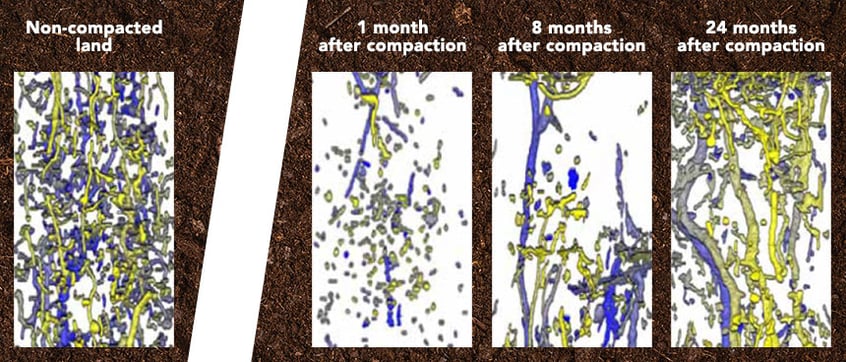
Surface compaction limits biological life in the soil and significantly reduces the presence of air and water in the upper soil layers. The lack of oxygene is not good for germination and will alter the development of the root system of future crops.
Deep soil compaction is situated below the plough pan and may go down up to 60 cm deep. It is this compaction that is generally caused by harvesting machinery. It is closely linked to the harvester’s axle load and to the weather conditions.
Basically, deep soil compaction is due to a weight of more than 10 tonnes per axle. In the case of a loaded harvester, there may be more than 28 tonnes weighing down on the front axle, which will have major consequences, especially if the land is slightly wet.
Compared to surface compaction or compaction linked to the plough pan, deep subsoil compaction is more damaging in terms of yield because the fissures and biopore infiltration holes disappear and prevent water and air from filtering in. As the natural water flow is blocked on the surface, the soil becomes saturated during the wet season, delaying the start of soil preparation and the planting of new crops. In addition, during the summer, the loss of deep water reserves leads to a premature water deficit and makes additional watering necessary, with all the related costs.
It is not easy to detect the presence of excessive compaction, above all in the case of deep soil compaction. Here are a few ways of establishing whether your soil is compacted:
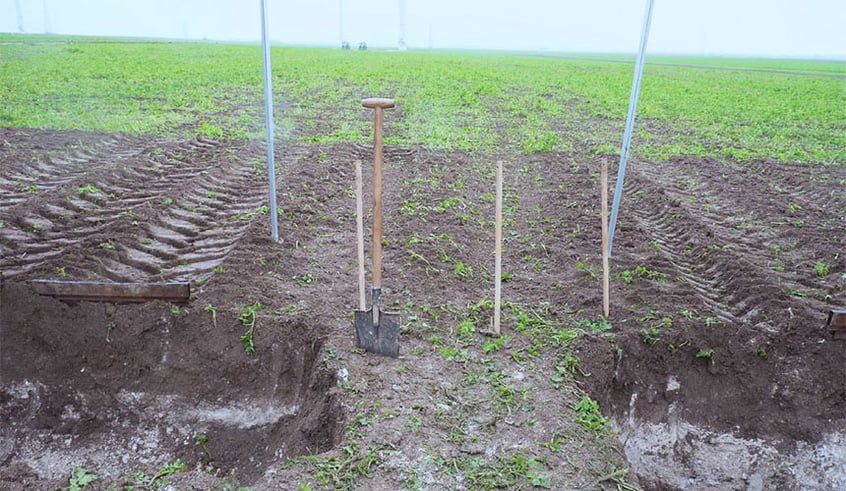
This is the most effective soil analysis technique. It consists in digging a ditch of around 70 cm deep perpendicular to the direction of traffic to observe the different layers that make up the soil in your land. By taking samples of the clods of earth at each level, you will be able to:
You can determine the level of soil compaction by using an electronic penetrometer. This device measures the effort necessary to drive the tool into the ground. If a lot of effort is required, this means that the land is very compacted.
The result depends heavily on the level of humidity of the ground. It is therefore best to do this type of measurement on dry soil. Avoid periods that are either too hot (soil too dry) or too cold (frozen ground) if you wish to obtain meaningful results.
Aside from compaction tests, you can also perform a visual inspection during plant growth to detect soil compaction. In compacted areas, you will find the presence of stunted plants which have fallen behind in terms of growth compared to other plants in the same plot of land.
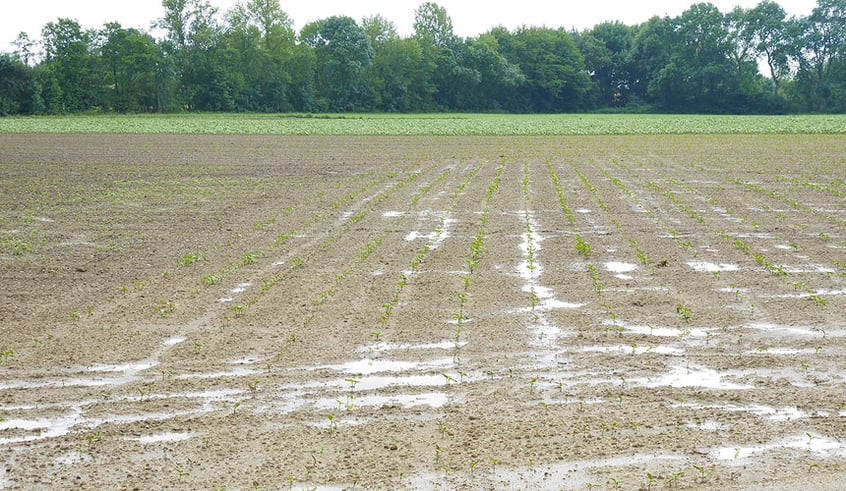
If you note the presence of persistent surface water more than three days after heavy rainfall, this means that the water is not infiltrating correctly into the ground because of deep soil compaction.
When crops on the same plot of land develop irregularly, don’t hesitate to dig up a few plants to have a look at their root development.
The soil is too compact in the following cases:
To combat compaction, you will need to break up the compacted areas mechanically in order to encourage the circulation of air and water once more, as well as biological life and root development.
Here are a few ways of decompacting your soil after the harvest:
This is the most traditional way of aerating the upper layers of soil over 20 to 25 cm deep. But be careful not to create a plough pan under the arable layer which is formed by the repeated passage of the plough shares always at the same depth. Make sure that you change the tilling depth with each passage and sharpen the plough blades properly.
A subsoiler or aerator can be used to cleave through the earth right down to the lower layers, without having to turn it over, unlike with a plough. It’s an excellent way of reaching the deepest layers and aerating the soil by splitting it so that the roots can penetrate and develop properly in the deep layers of the soil. Water can also seep into the fissures to reconstitute deep reserves for the dry season. Subsoiling should be carried out preferably after the harvest and be followed by the sowing of intermediary crops with deep roots to help recolonise the subsoil.
The absence of earthworms is a sign of excess soil compaction, yet these are your best friends, because soil that is rich in earthworms will drain water ten times faster than soil without. The regeneration of the soil by earthworms takes place naturally, but the process is very slow and you can accelerate it by adding fresh organic material. This will help stimulate life in the soil by combining earthworms and the work of roots of deep-root crops such as corn or radish which colonise the earthworms’ tunnels in the process of aerating the subsoil.
Aerating your soil won’t change anything if you do not remove the causes of the compaction. You obviously can’t change harvester, but you can change your tyres. The systematic use of low-pressure IF tyres such as the Maxi Traction Harvest or the Maxi Traction IF in large sizes for all your agricultural machines is ideal to avoid compacting your soil once again. For your harvester, using dual front tyres is the best choice you can make for soil preservation purposes.
You also have the possibility of emptying the hopper at the edge of the field, which avoids the traffic of full trailers across the field. The use of a dumper truck with wide low-pressure tyres is also a good solution for reaching the trailers easily, but the simplest thing to do is to deliberately reduce your trailers’ load, because one extra passage by your trailer is much cheaper than having to aerate the entire field.

Most people who read this article have also read some of the following articles: